2014年10月14日

Dreamcatcher - from Mystical Handicraft to Spiritual Art


After trying different techniques of making dreamcatchers, I wondered if I can "paint" on a dreamcatcher, making use of its original net structure. The idea was inspired when I was staring at a dreamcatcher, examining its perfect and amazing structure, and suddenly I thought I saw some sacred patterns out of it. A beautiful flower emerged from the net surface, and then a spiral.

I'm such a doer that I used colorful beads to outline the net of a dreamcather that evening, and made a work symbolizing the Galaxy.

That was the first time realized the net structure itself can resemble so many patterns, as long as I let the imagination run.


Then, of course, I must "draw" a lotus, my favorite flower, on a dreamcatcher, and made it a beautiful accessory. This time, I utilized the net structure completely, using interlaced threads to present layers of petals.


But my ambition didn't stop there. In addition to patterns that standard structure can resemble, I also wanted to create more interesting images that are not bound by the web but still following its nature.

That's when variation of normal knitting technique comes into place. One difficulty in "drawing" on a dreamcatcher is that there's no "long" straight line on the net, although the net itself is composed of many short thread segments. However, with advanced knitting techniques, different shapes can be formed.

Hence, two more artworks with spiritual themes were born - We Are One and Tree of Life.

I was so amazed by the outcome and the possibility of dreamcatcher creation, and was literally thinking about making a series of dreamcatcher collection on the theme of spirituality and sacred geometry.

Later, I've decided to return to simplicity, and made the Vertex by only shifting the point of threads intertwining with each other.

One friend saw the work and asked: "Is it possible to make a Tai-Chi-style dreamcatcher?"

"It's feasible, theoretically. But I'm afraid the shape won't be perfect due to the nature of dreamcatcher's web structure. I'll need more time to think about it.", I responded

Well, I mentioned earlier that I'm a doer, and so of course, I found a way to solve the problem without delay. I was holding the Vertex dreamcatcher and pondering how to blunt the edges and present Tai Chi's round characteristic, and then it stroke me that by shifting the crossover point from the middle to one side, the shape formed by the consecutive line segments is rounder and smoother.

Therefore, using the same technique of making the Vertex, I completed Tai Chi dreamcatcher as well. Here I present the ultimate integration of Eastern (Chinese) and Western (Native North American) traditions and cultures. Black intertwines with white, forming a perfect circle, just like the harmonic combination of Eastern and Western spirituality.

2014年7月16日

Dreamcatcher Evolution - Transformation of Butterfly


Finally I'll hold my first handicraft workshop in two weeks!! In the workshop, I will show the students how to make a dream catcher, and how their creativity can be integrated into their works.

I started to learn how to make a dreamcatcher when I was on my working holidays in the UK 2 years ago. At the time I didn't have proper materials at hand, and therefore I had to use something else instead. For the hoop, I used tiny bracelet in replace of willow; for the web itself, I used elastic thread bought in the shop in stead of sinew or cordage made from plants; as to the feather....although I could pick feathers everywhere in Brighton, they were too big for the tiny bracelet, and so I'd decided to use everything I had as the decoration.

For example, once I used alphabet beads and spelled my friend's name, and another time I even made a Chinese know and tied it under the dream catcher. I was so proud of that work - perfect combination of Eastern and Western tradition.

After coming back to Taiwan, finding proper materials for making a dream catcher is not a problem anymore; but still, I love to use bracelets to make dreamcatchers since the results look more elegant and exquisite. You may hang it above the bed as before, or you may wear it as an special accessory or necklace. I had add ingredient of FASHION in to the traditional mystical dreamcathers.

The web of a traditional dreamcatcher looks like a blossomed flower, with all its petals touching the edge of the hoop and layer by layer crossing each other. 

However, when I looked up information on the internet in preparation for my workshop, I've came across different styles of dreamcatchers and weaving techniques. Hence, I started to look for the works I like, and figured out myself how to make them. I love trying new things, especially advanced techniques.

At first, I only changed the way I weaved the web or decorated it, which resulted in different looks of dreamcatchers.
Then, I went further, and added another ring into it. With two hoops, the possibility is limitless, and I only taste it a little bit so far.
Last night, I've decided to leap to a higher level, and turned the world of dreamcatchers from 2D into 3D. I combined 2 bracelets together to form the skeleton of sphere, and began my weaving inside of it. I didn't plan carefully how I wanted the work to look like; my idea was to make each facet symmetrical and hope the thread tension may hold the shape. Also, to make the work more interesting, I added some beads, just to highlight the petal shape.

The result was a big surprise!! The web itself presented as a curved surface in topology, and the beads dotted into a beautiful butterfly!! It was totally beyond me imagination; I had never thought this idea could turn out to be something so beautiful.


On top of that, since the dreamcatcher is in 3D, it shows difference faces at different angles. From one angle, it looks like a butterfly spreading the wings, and from another angle, it looks like a tunnel or a butterfly net...well...hopefully it doesn't come for my butterfly. But it does make a good dream-CATCHER, isn't it?

I love this work very much; like the transformation of butterfly, I've made a breakthrough again. I proudly share this work to you :)


2014年6月26日

The Blue-on-Gold Beading Evening Gown

Album Link: Beading Dress

The only day I had bought a material package of a beading dress, just so I could spend enough money to get a VIP card from the handicraft material shop. I had been hoping to make one beading dress since a long time, but I'd never tried it because it seemed to take too much time and effort...and it did!!

So, I'd got the pack and started to string the beads one by one according to the instruction. It didn't take long before I became bored and decided to make some twist. The original design of this beading evening gown was all old, with a bold V-shaped strap on the back - not quite my style.

Therefore, at some point, I added some blues to this gold dress. First, the waist line, then dragging down two curves to make the gown more alive. And of course, for the most appealing hem, I decorated with blue beads as well; now the dress looked more interesting. In the end, for the back part, I'd made two slim straps crossing each other. 

Voila, here is my customized beading evening gown~~Let's see it from all angles!!


Twinkle Twinkle Beading Hearts

Album Link: Beading Hearts

It's a bit late, but I still need to record this important milestone in my handmade chronicle - for the first time in my life, I literally sold my handicraft works in a creative market!!

I remember just before last Christmas, one friend asked me if I wanted to join her and sell something at a one-afternoon-only creative market. Sure!! Selling my handmade works has been always one of my dreams, and since the chanced had fallen on me by fate, I would take it for sure!!

However, after the first excitement had faded away, anxiety and self-doubt took the place. What am I going to make and sell? Are my works qualified and good enough to sell as products? What if no one bought my handicrafts?

I had spent weeks before I had finally calmed myself down and made decision about the product I was going to sell.

The inspiration came from the Christmas gift I made Christmas. It was a Christmas-style beading heart with classic look. And actually I loved it so much that I decided to make a Christmas boot for my friend instead, and so I could keep the beading heart to myself.


Since the heart was so lovable, I thought it would be popular and attracting a lot of female customers as well.

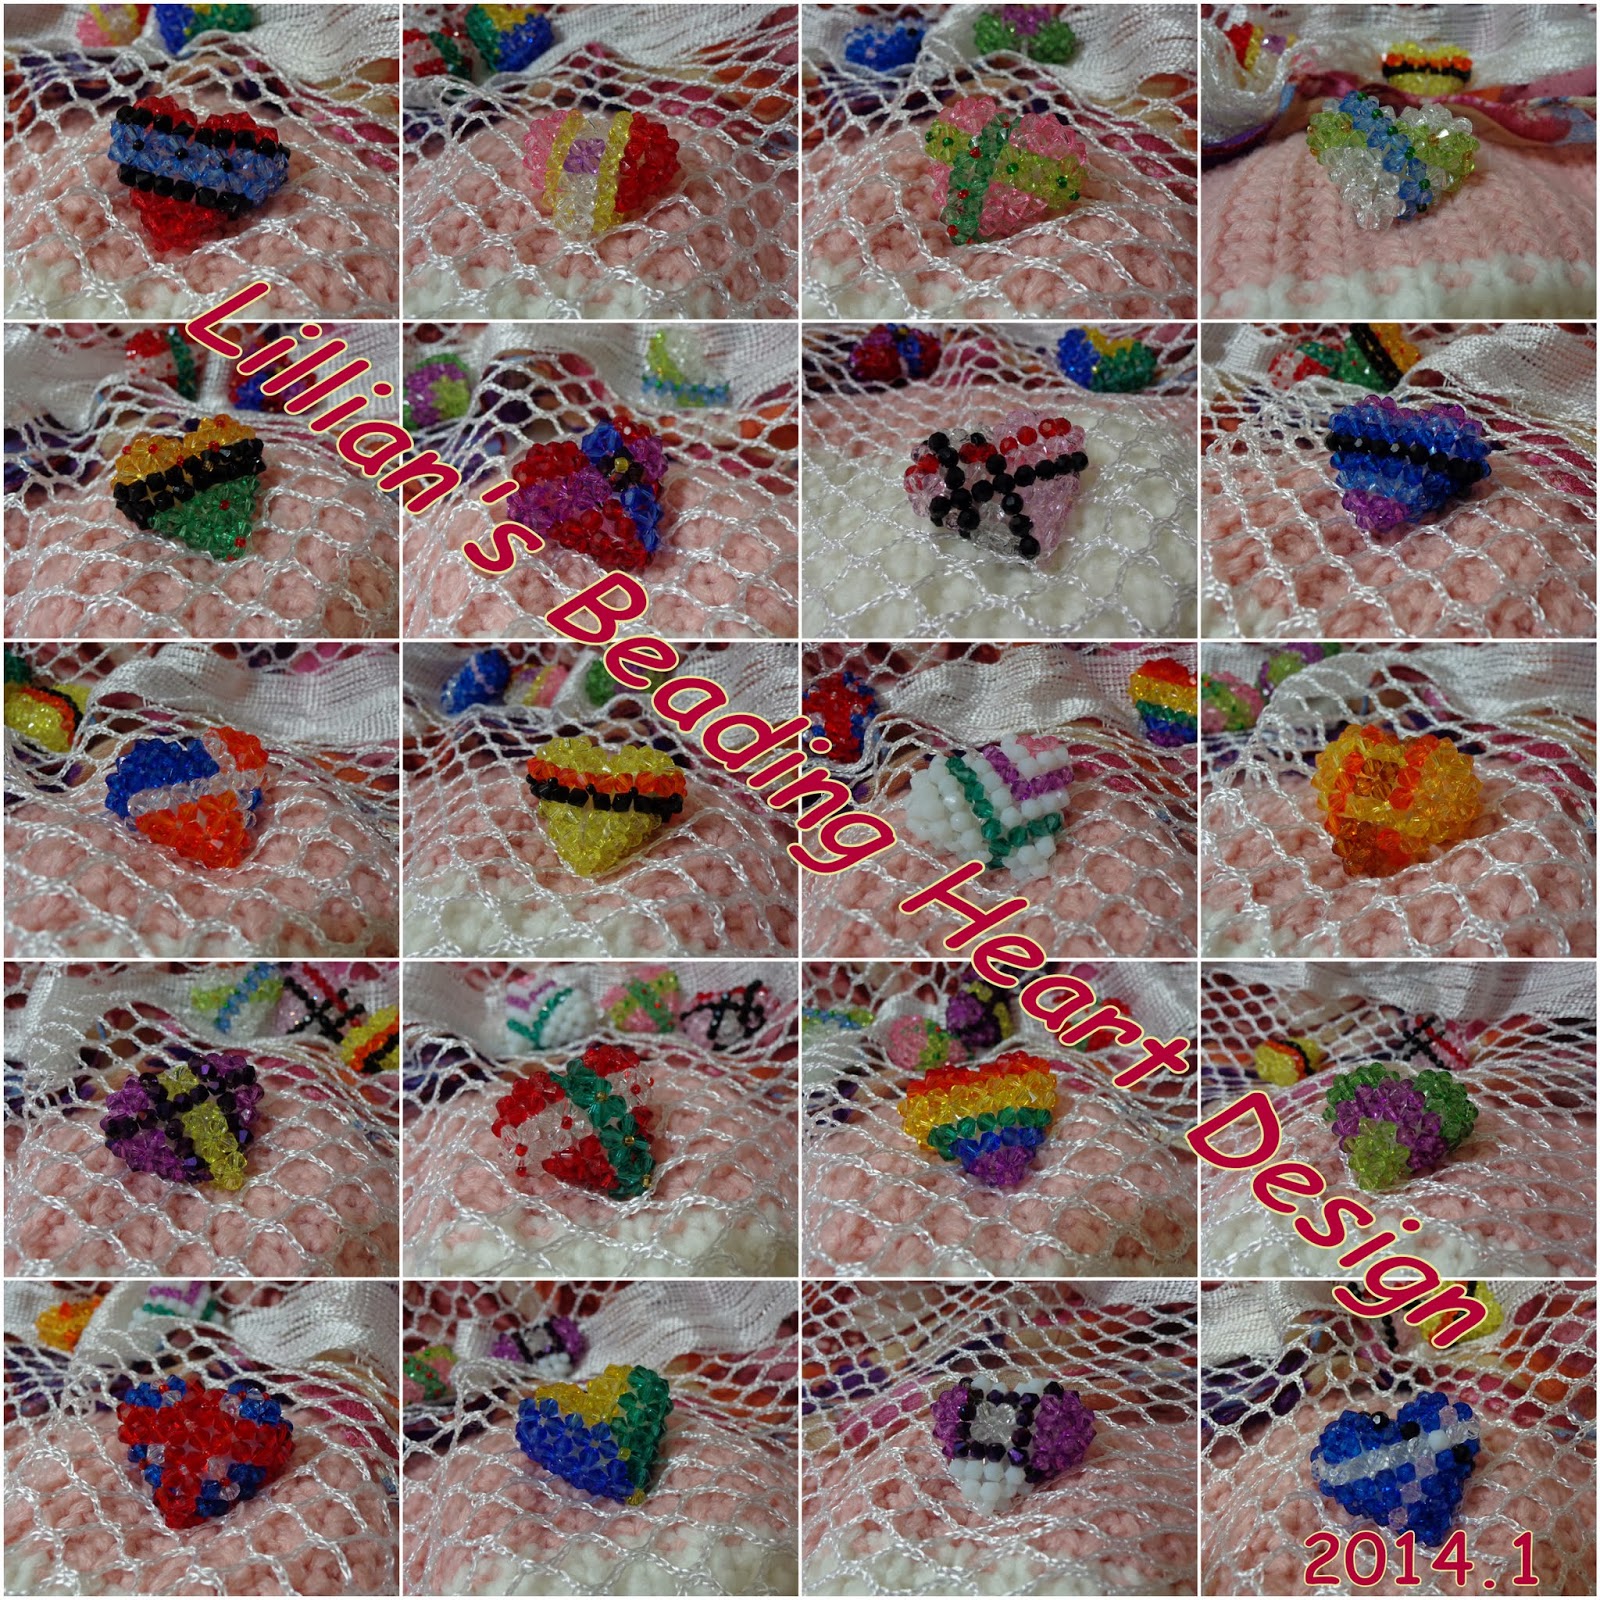
After the idea was confirmed and acknowledged by two other partners, I started to work days and nights non-stop for almost two weeks, and finally made about 20 beading hearts. Each heart had different and unique design. For example, the heart on the left is like a piece of jewelry, with deep and rich color tone but decorated by a golden touch in the middle. This is my favorite one.

On the big day, we set up the stand early and prepared to sell our stuff. My beading hearts were not so popular as expected; however my other product, Runic Lucky Charm, did. Nevertheless, it's all about
dream-come-true and the experiences on the way.

Although that might be a one-time-deal, the important thing was, I proved my handicraft works valuable, and someone did think them worthy of the price I set. Who could ask for anything more?

I've still got some beading hearts left; thus if you want to buy one, feel free to contact me. They can be used as pendants for key chains, accessories, or necklaces. Want your own unique and personalized beading heart? Contact me SOON!!


2013年11月15日

Autumn's Greetings from Europe

Album Link: Autumn's Greeting

Greetings! I'm back, after 16 months of dreamlike Britain life.

The last month staying in Europe, I wasn't in the UK; instead, I went to France to enjoy country life, and experienced European autumn with all my heart and body.

Everything was so colorful; trees turned from green to yellow to orange to red. At one look, you would see trees in all kinds of colors, just a carnival of mother nature.

While I was in Taiwan, I loved to pick up red maple leaves and put them in the books. They are the marks of autumn, and the most outstanding representatives of this cool and lively season. In Europe, the red leaves are even more prominent and attractive. They are red, but with different layers; the red is redder, almost crimson, like shiny rubies lying on the ground, waiting to be found.

Therefore, I picked up several red leaves every time I went out, and preserved them carefully. Before coming back, I already had a small collection of beautiful autumn leaves. Then I decided to make them into bookmarks, as souvenirs for my friends back in Taiwan; I named them as "Autumn's Greeting from Europe". I love Europe very much, and I hope to bring some pieces back to share my love with my beloved friends :)

Moreover, the red leave bookmarks are not just simple; I added more elements onto them - clovers, one- or two-leave clovers to be exact.

I was in a forest one day, and found many small clovers by the side of the road. My first thought was to find a clover with four leaves, as we all know that presents good luck. Unfortunately I wasn't lucky enough; however, when I was searching for the four-leave clover, I found the shape of a one-leave clover is like a heart, and that of a two-leave clover is like a butterfly. Then I thought: since I can't find my lucky four-leave clovers, why not pick some "clover hearts" and "clover butterflies"?

Hence, I brought home a handful of clovers that day, and then put them on the red leave bookmarks as further decorations. The end result was positive; the clovers really made those bookmarks more interesting and playful, and the green color balanced the whole tune.


I brought the bookmarks, 20 pieces in total, back to Taiwan, and intend to give them to my friends in Taiwan. So, my friend, contact me soon if you a piece of autumn from Europe; it's one of the kind in this world!!

2013年11月9日

Shining Angelic Lights


I should've posted this article a long time ago, but I had been busy enjoying my British life until now.

I've been taking A Course in Light for many years, and this course has been one of my inspirations for handicrafts. Lots of ideas often came to my mind when listening to the course, and my hands started to move spontaneously. 

Last year this time, I finally reached the series of Angelic Level, which introduces the final levels of this course. In the Angelic  Level, all the light colors we had learned in the previous levels mix together and form new colors of light, ex: white + gold = yellow, orange + pink = magenta.

I always love colorful things, and I was crazy about beading at the time, so I thought: why not materialize those angelic colors in the form I love the most - handicraft?

So, here it is, the collection of angelic light. Each combination of colors form a new color, and was materialized as a piece of jewelry, including necklace, hair pin, brooch, ring, bracelet, pendulum, earring, etc.

You can take a closer look at each piece via the album link above, and know the stories behind if you know Chinese.

Enjoy! This is one of my most "useful" creations...I wear those jewelries all the time...hoping to absorb the angelic lights more efficiently :P

2012年12月24日

True Christmas Spirits

Album Link: 2012 X'mas

Merry Christmas!!

This Christmas is a very special one to me, because I'm in Europe, where people REALLY celebrate Christmas!!

In the beginning of December, I went to Germany, Austria, and Czech Republic to visit Christmas markets in different cities. Christmas has been always my favorite holiday, even though I'm not a Christian. I love the true spirits of Christmas - Love, Forgiveness, Giving, etc. 

So, since I'll enjoy the white Christmas in lovely Europe, of course I want to present some Christmas spirits - by giving some Christmas ornaments to my couchsurfing hosts. Right, I used couchsurfing for my entire trip, and I think it's now my favorite way to find accommodation in my trip!

The first work is a beading snowflake, which was my original creation. I tried to imagine the structure of a snowflake, and used beads to construct the shape, and of course in the end, used a bracelet to consolidate the structure. This is my favorite work out of three, and luckily, it was picked by my first and favorite host :)


This one I learned from the workshop. It was only a piece from demonstration, and we wasn't given the instruction of this work. But still, I figured out how to make it by studying it closely. I love weaving things like this; so I had a lot of fun making it. It was then picked by my host in Prague, a lovely girl.


Then, this one was made from the remained materials from other works. Since it's Christmas time, I decided to bend the thick wire into the shape of a Christmas tree, and use the beads us the decorations on the tree. On top of the tree, I put a golden star as usual for the final touch. My host in Vienna got this one, and she loved it a lot, thinking it's the perfect element for her Christmas tree :)


Oh! It's not finished yet!! Because later I found out I was going to move out after the trip, I decided to make a leaving gift for my host mom; after all, Christmas is all about forgiving and giving, isn't it?

I bought some candles, red and green for Christmas, and add some ornaments on them. I learned that from the workshop, and the result was satisfying and breathtaking!! To be honest, I love the pieces very much...but Christmas is about sharing the things you love....so I gave them away to show my gratitude.

I've been making all kinds of Christmas gifts for my friends for the past few years, and this was the first time I shared those gifts with strangers and internally...quite exciting, isn't it? Finally, my works are starting to spread all over the world!

2012年11月4日

Colorful Mandalas


There are several things that I love: colors, weaving/knitting, and patterns. Most of the times, I can only include some of the elements in my handicraft works. But this time, I got it all.

This design is call Mandala, which is basically bead weaving technique which I had known long ago. But I didn't really put too much effort in rocailles weaving when I was young since it was time consuming apparently. I spent much time studying how to weave the beads into 3D objects, such as animals, fruits, balls, etc., instead.

People in the UK are crazy about Mandala, Shamballa kind of things, and they even have course to teach you how to make these things. So I took one of the class and learned how to make a Mandala.

I instantly decided to pick red, yellow and blue as my main colors for the Mandala, as they are the three basic color in light. After finishing one, I was fascinated by the result, and found it was like the feather of a peacock.

We didn't have time to make too many Mandalas in the class, and I ended up finishing 3 Mandalas. I didn't want to make a bracelet as instructed, and didn't intend to make more in same patterns; thus, I decided to make a one-of-the-kind necklace.

I recalled that I had picked a tiny feather of a peacock when I was in London last month, and it would be the perfect match for the Mandalas I had made.

It took me some time to work out how to combine the three Mandalas as well as the peacock feather together, but I was satisfied with the result. The necklace itself was also a special design, with the mixture of indigo and metallic blue beads and the S-shape formed by continuous metallic blue beads. Due to the similarity of the colors of the beads, the pattern was not obvious, which was designed on purpose to avoid it taking away the visual focus from the Mandalas and the feathers.

I love the dazzling colors and patterns so much that I had to make another one to fulfill my desire. The second one was full of new ideas that I weaved two Mandalas together into an infinity symbol. On top of that (or I should say on "bottom" of that), I made a chain maille bracelet as the base for the infinity Mandala. This is a gift for Nalia; hope she will like it.


Again, making this, whether the Mandala part or the chain maille part, is time-consuming, but I love it...so let it be~

2012年10月17日

The First Step toward My Dream


People know that I love to make handicrafts, but they probably don't know that I have started to make handicraft since I was ten. We had some choices of after-class in our primary school, and I had chosen paper craft club since I loved to play with papers.

I can still remember how amazed I was when I cut the Chinese character "春" with out of just one piece of paper for the first time. After that, I had learned how to make lots of paper crafts from the class. In the mean time, I had learned how to make a lucky bracelet from thread weaving and bead threading, and almost since then, I've known handicraft making would be my hobby for life.

Years passed by, I had learned more and more skills from the books and the clubs in the school, and I had been the leader of DIY club when I was in university. Then, I decided that I didn't want to play by the book (literally) anymore.

I quit making handicraft for a while, but there was a yearning inside me for making handicrafts. I found out that when I was down, making handicrafts could always cheer me up and make me feel content, and that was when I started to really recognize handicraft making as my passion for life.

I was too afraid to follow this passion till now. I have a opportunity to reset my life path, and I want to give handicraft a shot. Hence, I'd spent a whole week to make this questionnaire, inspired by my volunteering job for the Brighton & Hove city council and my young friend Temmy, to gather people's opinions and comments about my works.

The result may be brutal, but this will be my first step to approach my dream - my handicrafts being appreciated by people and really valuable.

Here is the link of the questionnaire; I won't close it in the foresee future, so you're welcome to check this questionnaire anytime and drop some words regarding to my handicrafts. I truly hope this questionnaire can let me to know my handicrafts more from different perspectives, and help me evaluate my next step.

But anyway, I will keep making and posting more handicrafts; that's for sure :)

2012年8月10日

Dream A Little Dream on Dreamcatchers

Album Link: Dreamcatcher

I have had a fancy to dream catchers for a long time. I remembered that I saw many dreamcatchers in a shop, in Old Town in San Diego, selling native American crafts in 2007, and I decided that I must have one someday.

I bought one, and made one later, and that was the  end of my fancy to dream catchers...at least that was what I thought.

Few years later, when I walked in the North Lane in Brighton two weeks ago, I saw dreamcatchers again in a native American shop. The dream catchers seemed to bring back my obsession for them, and I kept seeing them in all kinds of accessories (earrings, hair pins, necklaces...) since then.

When Emma showed me the procedure of making a dream catcher in her garden last Sunday, I knew it was a sign. Thus, the next day I went to Primark to buy a bunch of bracelets (10 for 1 pound) after class, and on my way home, I found a piece of feather which is perfect for  dressing a dreamcatcher.

Using the bracelet as the frame, tangled with shearing elastic, attaching a bead as the core, and don't forget to give a final touch with the feather; now an exquisite dream catcher is done.

The perfect work didn't satisfy me, especially when one of my classmate Valentina asked me to make one for her after she saw it. As a result, I couldn't help but making another 3 dreamcathers in the following days. Each work was one of the kind and unique; I put in much energy when I make one.

I'm not sure what to do with all the dreamcathers I made yet, but I'm pretty sure I'll make more in the near future.

I LOVE dream catchers!!

2012年5月30日

A tiny farewell fasion show


I'm leaving again, and this time I don't know when I will come back.

Tangram Insprations
Anyway, I bought some papers with beautiful colors and patterns. These papers were meant to be made in different tangram patterns, but the outcome wasn't not pleasant enough; thus I decided to turn to another direction.


2.5D Bookmarks - Vase
 Someday when I was attending the online course of A Course In Light (ACIL) (Planetary 8 Mint Green), I took the leftover of the beautiful papers with flower patterns and started to cut them into different shapes of vases. The work was so beautiful that I even intended to sell it as a collection.


Several weeks later, when I was taking ACIL (Planetary 9 Introduction) and I thought....I'm leaving again, and as usual, I want to make some goodbye-gifts to some people...I want this to be a special, beautiful, and useful gift...well...I did make some collections of clothes and bags; why not do that again?

Inspired by my own clothes, I made 15 pieces of tops/pants/skirts in the end. When I took picture (using my new camera Nikon P310) for them, it was just like a tiny fashion show, and God knows that I really love to match them into different styles...just like I do to myself everyday~

Farewell again. Each piece is hidden with a blessing from Archangel Oracle Cards; may all the people getting the handmade bookmark a happy life!!

----------------Update on 6/30---------------------
I thought it's boring to just give out the pieces alone, so I decided to put clothes on them...literally.

In one afternoon, I sat in the cafeteria of our company, and pocketed each cloth-style bookmark into custom-made T-shirt-shaped frame which I made, decorated with the paper tapes I lent from Shirley.

The outcomes turned out great, and the farewell gifts became more memorable...at least that's what I think :P

Now, this is the real goodbye. Hope my 15 ex-coworkers can preserve my gifts for long :)


2012年2月20日

ACIL Keys & Codes in the reality


I've been taking the class of "A Course In Light" for years. One level led to another, I was in 7th planetary level, which I had never expected that I could reach.

The main topic of planetary 7 is keys and codes, which will be imprinted in our soul and will be activated one day when the time is right.

I love symbols, especially those with metaphor in it, and I always love to visualize things in my mind. So...why not make these "keys & codes" images into reality? That way I don't have to imagine what they are like anymore.

That's how the idea was born.

The idea was easy, but the process wasn't. I spent a weekend to picture the concept of each image and it's basic materials. However, it's not that simple to turn concepts into reality.

Some of the keys & codes are plain to design, like LOTUS and EYE; I can almost see how they are like the moment I decided how to make them.

But this was not the case for FACES and FLAME; true, I had a rough idea how to present them, but the output is just not what I expect. To make human face by origami is usual, but to make human profile by origami is insane. I tried many times to fold the eye, the nose, the mouth, but it end up with a mess, just lots of folding lines mixing together. And the FLAME is even harder, I mean...how to you make insubstantial flame out of a piece of tangible paper?

Of course, I figured them all out in the end, and hence accomplish the twelve pieces of work.

LOTUS was the first (for sure, since I fancy lotus), and CORNUCOPIA was the last (because I had to make the fruits from paper clay and color them), so you can also say it's from oneness (the meaning of LOTUS) to fruition (the meaning of CORNUCOPIA).

The twelve symbols are related to 12 chakras represented by 12 colors of light, also the main color of each work.

Here I array the "keys & codes in reality" by the bodies they correspond to; from top to bottom: Rational Body, Emotional/Perceptional Body, and Physical Body (the bottom 2 arrays).

Let's put an end to my study in ACIL planetary 7.